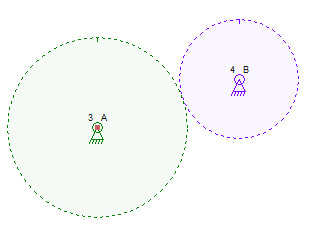
Okay, the user interface is pretty much working for gears.
Gears
Now I need to work on the simulation. This sounds simple, but there are some issues that I still need to work out. To start with, the existing simulator does not “follow” the kinematic chain.
No Simple Chain
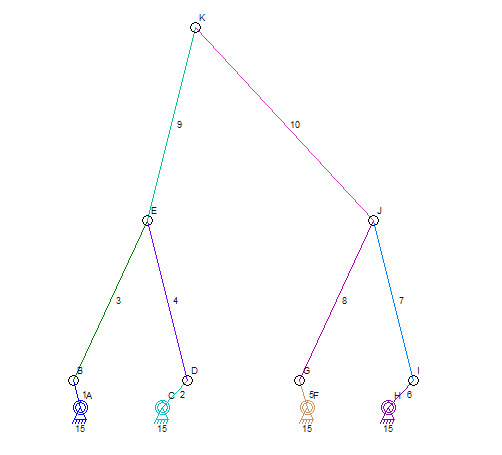
In the image above, the simulator could not start at one of the anchors and then follow a path of simulated movement from there to the end. The position of connector E cannot be determined until B and D are calculated. The same goes for G and I being required to calculate the position of J. And then K can be calculated. Instead of ever following a chain of connections, the simulator iterates through all of the links looking for connections that can be calculated. The simulator would examine link 3 (during the iteration) and see that connector B is in a known location. Then K and D are examined to see if either of those is in a known location. As soon as a pair of links share a connector and can be moved to their simulated position, the simulator does the calculation and moves on to whatever link is next in the internal list (of links). The iteration continues until the simulator can find no new links to update. In the end, the simulation is successful, or there is some part of it that could not be moved and the simulator reports an error.
Gears present a new kinematic chain problem.
Complex Gearing
The same type of iteration will happen for the gears. Some gears might get bypassed because their rotation cannot yet be determined. Some will get rotated while leaving other meshing gears alone until later.
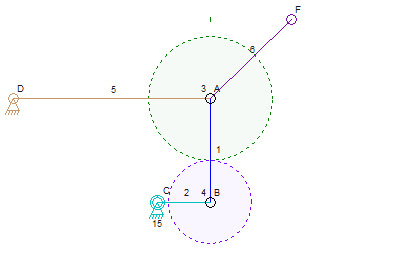
The image above (Complex Gearing) shows an example of a mechanism that will be interesting to simulate. Assume that gear 4 is fastened to link 2. When link 2 rotates around C, the gear will naturally rotate too. Link 5 will oscillate up and down being pulled by link 1. And the gears? Since gear 4 is rotating at B, each revolution of link 2 around connector C will rotate gear 4 revolution. Gear 3 will then go around (it is not fastened to 1 or 5) at the appropriate 3:2 ratio. And I would fasten gear 3 to link 6 making connector F then go around A along with gear 3.
I need some way to annotate the fastening of gear to link. Maybe in the labels or maybe with some faint dotted lines. I’m not sure yet, but some sort of visual change is needed.
How to simulate this? I don’t know yet. I know the bigger picture requirements, but not the details. One way would be to rotate gear 4, and any other gears fastened to link 2 at the time that link 2 is rotated. Gear 3 could be rotated at that time, but link 6 could not be rotated because rotation and movement to a new location all happen at the same time in the simulator. Do I add a bunch of variables to my data structures to keep track of what rotations that I’ve applied or not? Or do I simply not rotate gear 3 until the time when I know the new location of connector A. I think that I don’t apply any rotation to 3 until 4 has been rotated and connector A has been moved. That should do the trick.
I’ll try to get something working this weekend. It will be challenging because there may be a scenario that breaks the current plan. We’ll see.
And a Note About Fastening
I just realized that the Fasten feature fastens a drawing element to a link and now also fastens a gear to a link. But is also fastens that link to the gear too. In other words, if a gear is rotated, it will move a link that is fastened to it. If a link is moved, it will move a gear fastened to it. Since a fastened gear and link must share a connector, the effect is that a rotated gear will rotate a fastened link around the shared connector and a rotated link will rotate a fastened gear around the shared connector.


